Every host eventually gets the same message at 11pm: “Hi, sorry, the WiFi password isn't working.” Usually the password is fine and the guest has typed a capital I where there was a lowercase L. A WiFi QR code removes that possibility completely. The guest scans, the phone joins, and you never hear about it.
This guide covers the whole process, creating the code, testing it properly, printing it so it scans first time, and the security setup most hosts get wrong.
Why hosts bother with this
The obvious reason is convenience, but the real reasons are less obvious:
- It removes a review risk. Connectivity problems in the first ten minutes colour the whole stay. Guests rarely mention a smooth WiFi setup in a review, but they absolutely mention a frustrating one.
- It lets you use a strong password. Most hosts pick a short, simple password precisely because it has to be typed. With a QR code, password length stops mattering.
- It cuts your message volume. WiFi questions are one of the most common host support requests, and they almost always arrive at inconvenient hours.
- It works before the guest is online. This is the part people miss, a guest with no WiFi cannot open your digital guidebook. The code has to work offline, and a QR code does.
Step 1: Find your exact network details
Before generating anything, get three things right:
- The network name (SSID): exactly as it appears in the WiFi list, including capitalisation. “Flat3_Guest” and “flat3_guest” are different networks to a phone.
- The password: copy it from your router settings rather than from memory or an old note.
- The security type: WPA/WPA2 for essentially every router made in the last decade.
If your router has a sticker with default credentials and you have never changed them, now is a good moment to. Default passwords printed on routers are widely known per manufacturer.
Step 2: Generate the code
Use our WiFi QR code generator. Enter the SSID, password and security type, then generate and download the PNG. The code is created in your browser, so your WiFi password is never sent to a server.
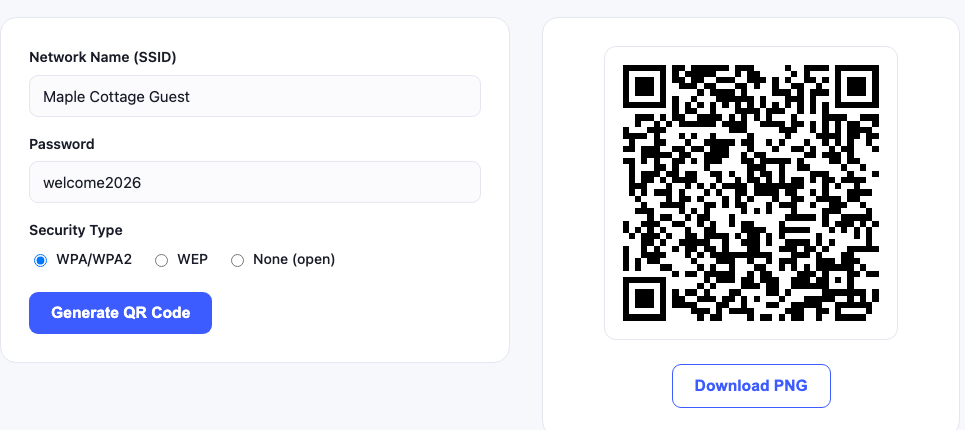
WIFI:T:WPA;S:Maple Cottage Guest;P:welcome2026;;, which is what was typed.Step 3: Test it properly (most hosts skip this)
There is exactly one valid way to test a WiFi QR code, and it is not scanning it with your own phone.
The correct test: take a second phone that has never joined the network, or on your own phone, go to WiFi settings and choose “Forget this network”, then turn WiFi off, scan the code, and see if it joins. A phone that already knows the network will connect regardless of whether your code is correct.
This single step catches the majority of “my QR code doesn't work” problems before a guest ever sees them.
Step 4: Set up a guest network first
This is the part that separates a well run listing from a risky one. If you print a QR code for your main network, every guest who has ever stayed has your primary WiFi password, and their devices sit on the same network as anything else you have connected: cameras, smart locks, a personal laptop, network storage.
Almost every modern router can broadcast a separate guest network. It provides internet access but isolates devices from your main network. Set one up, give it its own password, and generate the QR code for that network instead.
Practically, this means:
- Log into your router admin page (usually 192.168.0.1 or 192.168.1.1).
- Find “Guest Network” or “Guest WiFi” in the wireless settings.
- Enable it, name it something obvious like “Apartment Guest”, and set a password.
- Enable client isolation if the option exists.
- Generate your QR code for this network only.
If you ever need to change the password between guests, you change it on the guest network alone, your own devices stay connected.
Step 5: Print it so it actually scans
Printing is where good codes go to die. The rules are simple but essential:
| Factor | Get it right | Common mistake |
|---|---|---|
| Size | 4 to 5cm per side for a card on a counter | Shrinking it to fit a design |
| Contrast | Dark code, white background | Grey or coloured code to match decor |
| Quiet zone | Clear white margin all around | Cropping tight to the edge |
| Finish | Matte paper or matte lamination | Gloss, which reflects light into the camera |
| Placement | Flat, well lit, at eye or counter level | Inside a dark cupboard or behind glass |
Always print the password as text underneath. It costs one line and covers the guest whose camera app is misconfigured, whose phone is very old, or who simply prefers typing.
Where to put the card
The three placements that work best, in order:
- On the kitchen counter or entry table: the first flat surface a guest puts their bag on. A small standing frame works well.
- Inside the welcome book: on the first page. Not page six.
- In the main bedroom: if the property is large enough that a guest may not pass the kitchen first.
Do not put it only in the digital guidebook you send by email. A guest standing in your hallway with no data allowance cannot open it.
Sending it before check in
Sending the code in advance is useful as well as, not instead of, the printed card. Guests with roaming data can connect the moment they walk in. Attach the PNG to your check in message, or include it in your digital guidebook.
Be aware that this puts your guest WiFi password into a message thread that lives on Airbnb's servers and the guest's phone indefinitely. Another argument for the code pointing at a guest network rather than your main one.
If you host multiple properties
Generate a separate code per property and label every printed card with the property name or unit number. Hosts with several units routinely end up with the wrong card in the wrong flat, and the guest has no way to diagnose it, the code scans fine, it just joins a network that is not in range.
Keep a simple folder with the PNG for each unit, named by property. When you change a password, you will be glad you can find the right file.
What to do when you change the password
The password is stored inside the image itself, so a new password means a new code. There is no way to update an existing printed code. That has two consequences worth planning for:
- Do not laminate rigidly if you rotate passwords. Use a frame or a card holder you can slide a new print into.
- Keep the source file so regenerating takes thirty seconds.
If you change passwords between every guest for security reasons, build the reprint into your turnover checklist alongside the linen.
Common problems, quickly solved
The code scans but the phone says “incorrect password”
A typo in the password, or the wrong security type. Regenerate carefully, then retest on a device that has forgotten the network.
Nothing happens when the camera sees the code
On iPhone, check Settings → Camera → Scan QR Codes is on. Otherwise it is a print problem: too small, too dark a background, or no quiet zone.
It worked last month and stopped
Someone changed the WiFi password, often the internet provider during an engineer visit. Regenerate.
Only some guests have trouble
Usually very old Android devices, or a 5GHz-only network the device cannot see. Ensure the guest network broadcasts on 2.4GHz as well.
Other codes worth printing while you are at it
Hosts who add a WiFi code usually find two or three more uses in the same afternoon:
- A URL QR code pointing at your digital house manual, local recommendations, or the checkout instructions.
- A text QR code for things that need no internet at all, bin collection day, the alarm procedure, checkout time.
- A vCard QR code so guests can save your contact number without typing it.
The short version
Set up a guest network, generate the code for that network, test it on a phone that has forgotten the WiFi, print it at 4 to 5cm on matte paper with the password written underneath, and stand it where guests drop their bags. That covers the large majority of what goes wrong.
Ready to make yours? The WiFi QR code generator is free, needs no signup, and never sends your password anywhere.
The router terms you will run into
Setting up a guest network means opening your router's admin panel, and the labels there vary by manufacturer. These are the terms that matter and what they mean in practice:
| Term | What it means for you |
|---|---|
| SSID | The network name guests see in their WiFi list. Case sensitive. |
| WPA2 / WPA3 personal | The encryption standard. Choose WPA in the generator for any of these. |
| Pre shared key (PSK) | Just another name for the WiFi password. |
| AP isolation / client isolation | Stops guest devices seeing each other and your devices. Turn this on. |
| Band steering | Automatically moves devices between 2.4GHz and 5GHz. Usually leave enabled. |
| Captive portal | A sign in page after connecting. A QR code cannot bypass it, avoid on guest networks for rentals. |
| DHCP lease time | How long a device keeps its address. Short leases can drop guests overnight. |
| Bandwidth throttling | Caps guest speed. Useful, but set it high enough for streaming or you will get complaints. |
Router brands label these differently. On a TP-Link you will find guest access under Wireless; on a Netgear it sits in the Basic menu; on an ISP supplied router it may be hidden under Advanced. If you cannot find it, search your exact model plus "guest network".
What guests actually expect in 2026
Connectivity has quietly become a rated amenity rather than a bonus. A few expectations worth knowing:
- Speed sufficient for video calls and streaming. Remote workers book rentals specifically for this, and it appears in reviews when it fails.
- Coverage in the bedrooms: not just next to the router. A mesh node or a repeater is cheaper than a bad review.
- No daily reconnection. Session limits that log guests out overnight feel broken even when they are working as configured.
- Instructions available offline. The reason a printed QR code beats a link in your digital guidebook.
If your listing mentions fast WiFi or a dedicated workspace, the connection is part of what the guest paid for, and problems with it are treated accordingly.