A QR code in an email signature solves a specific, common problem: someone reads your email on a computer, wants your details on their phone, and has no easy way to move them across. They scan, and it is done.
This guide covers what to encode, how to add it in Gmail and Outlook, and the sizing and formatting details that decide whether it works or just clutters your emails.
What to encode
Pick one thing. A signature with three QR codes is worse than one with none, because nobody knows which to scan.
| Encode this | Best when | Tool |
|---|---|---|
| vCard contact details | You want to be in their address book | vCard generator |
| Your booking or calendar link | You want meetings scheduled | URL generator |
| Your portfolio or website | You want your work seen | URL generator |
| A review link | Client facing service business | URL generator |
For most people the vCard is the right answer, because it is the thing an email signature cannot otherwise do. A website link is already clickable in the signature; contact details are not saveable in one tap.
Step 1: Generate and size the image
Create your code, download the PNG, then resize it before adding it to the signature. Two numbers matter:
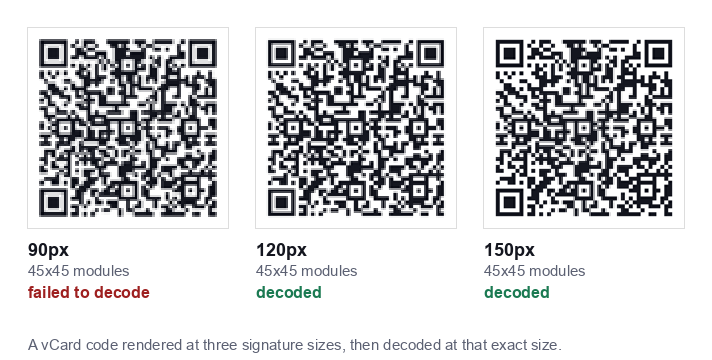
- Display size: 120 to 150 pixels square. Smaller than 100px becomes hard to scan off a screen; larger than 150px dominates the signature and looks unprofessional.
- Source resolution: at least 300px square. Supply a larger image and let it display at 120 to 150px, so it stays sharp on high resolution displays.
Keep it PNG. JPEG compression softens the hard edges that scanning depends on, and the file size saving is negligible at this size.
Keep the data short. A vCard with five fields makes a clean code that scans off a screen easily. Add a postal address and a second phone number and the pattern gets dense enough to fail at 120px.
Step 2: Add it in Gmail
Gmail's signature editor cannot upload a local file directly, so the image needs to be somewhere Gmail can reach, Google Drive works, or any image URL.
- Upload the PNG to Google Drive and set sharing to Anyone with the link. Without this, recipients see a broken image.
- In Gmail, open Settings → See all settings → General and scroll to Signature.
- Place the cursor where the code should go, then click the Insert image icon.
- Choose the image from Drive, or paste a web address if it is hosted elsewhere.
- Click the inserted image and pick Small or Medium. Medium is usually close to the right size.
- Add a short line of text beside it, such as "Scan to save my contact details".
- Scroll down and click Save Changes. This is easy to miss, and nothing is saved without it.
Step 3: Add it in Outlook
Outlook handles local files directly, which makes it simpler, but the steps differ between versions.
Outlook on Windows (desktop)
- Go to File → Options → Mail → Signatures.
- Select an existing signature or create one.
- Click the Insert Picture icon and choose your PNG.
- Right click the image, choose Picture, and set the size to roughly 130 × 130 pixels.
- Click OK, then OK again.
Outlook on the web
- Open Settings → Mail → Compose and reply.
- In the signature editor, use the Insert pictures inline button.
- Select your PNG and drag a corner handle to resize.
- Click Save.
Outlook on macOS
Open Outlook → Settings → Signatures, edit a signature, and drag the PNG straight into the editing area. Resize with the corner handles.
Step 4: Test it before you rely on it
Signature images break in ways you cannot see from your own outbox. Test all three:
- Send yourself an email and open it on a computer. Does the image appear at all?
- Scan it from the screen with a phone. Does it produce the right result?
- Send to a different provider: if you use Gmail, send to an Outlook address and vice versa. Cross provider rendering is where signatures most often break.
Also check what it looks like in a reply chain. Some clients strip or shrink images in quoted replies.
Common problems
The image shows as a broken icon for recipients
Almost always a permissions problem with a Drive hosted image. Set sharing to "Anyone with the link". If it persists, host the image somewhere public instead.
Recipients see it as an attachment
Some clients treat inline signature images as attachments. There is no complete fix, since it is a client side behaviour, but keeping the file small (under about 20KB, which a QR PNG easily manages) reduces how intrusive it is.
It will not scan from the screen
Usually too small, or blurred by resizing. Rebuild from a larger source image and display at 130px. Also try increasing screen brightness, dim screens defeat phone cameras.
It gets blocked by the recipient's email client
Many clients block remote images by default, and the signature then shows nothing. This is why the code should never carry information that exists nowhere else in the signature, always keep your phone number and email as plain text too.
Design details that matter
- Keep the signature simple around it. A code surrounded by social icons, a logo and a legal disclaimer disappears.
- Label it. "Scan to save my details" converts far better than a bare code.
- Do not use a coloured or inverted code to match brand styling. Dark on white is the only combination that reads reliably on every screen.
- Leave the white margin intact. Cropping tight to the code's edge breaks scanning.
- Consider leaving it off internal email. Colleagues already have your details, and it adds weight to every message.
When a QR code in a signature is the wrong tool
Be honest about the cases where it adds nothing:
- Mobile to mobile email. If your recipients read email on phones, they cannot scan a code on the same screen. A plain tappable link is better.
- High volume automated email. Images increase the chance of spam filtering and slow rendering.
- When the information is already one tap away. A website link in the signature is already clickable; encoding the same URL adds a step rather than removing one.
Ready to make one? Start with the vCard QR code generator, it is free, needs no account, and your details never leave your browser.